Lentikit is an open source java program to help users produce interlaced images for lenticular sheets.
Lentikit can be downloaded from sourceforge. It's early days yet, so the software is still very very rough around the edges (and in the middle too!).
Lentikit is probably going to be made up of several different programs, the most useful program is Interleaver.
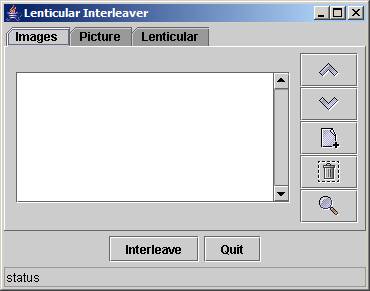
To use this program run java -jar lentikit-version.jar (or you may be able to simply launch the jar file staright from your desktop). This will bring up a screen like:

Notice that there are three tabs, these are
The first tab, Images, has a list to the left where you organise your images in "Left" to "Right" order. To add images to this panel you can drag them from your file explorer, or you can click on the open file icon ![]() and use a standard file window. Lentikit only takes gif, jpg and png images at the moment, though this will change in the future.
and use a standard file window. Lentikit only takes gif, jpg and png images at the moment, though this will change in the future.
The order of the images can be changed using the move up ![]() , move down
, move down ![]() and remove
and remove ![]() buttons. Clicking on the preview
buttons. Clicking on the preview ![]() button will bring up a new window with the selected image in it. You can scroll around the image using the scroll bars (if its big enough) and zoom in/out by right/left clicking with the mouse (be sure to hold it very still while doing so).
button will bring up a new window with the selected image in it. You can scroll around the image using the scroll bars (if its big enough) and zoom in/out by right/left clicking with the mouse (be sure to hold it very still while doing so).
We'll get back to the Interleave and Quit buttons later.

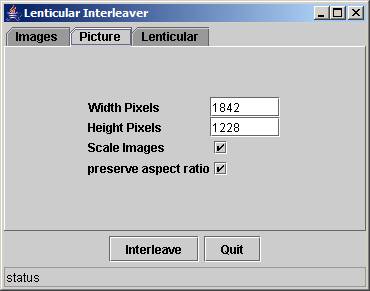
On this tab you get to enter what size (in pixels) you want the final image to be.
The "Scale Images" checkbox tells lentikit to resize the images (larger or smaller) from the previous tab so that they fill the output image.
The "preserve aspect ratio" checkbox tells lentikit to make sure that it doesn't distort the images when it stretches them.

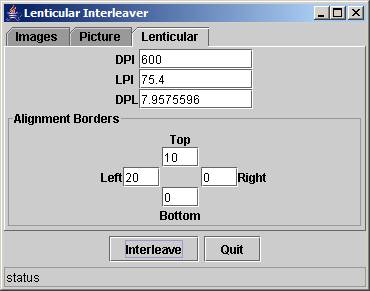
It is on this tab that you enter the details specific to the printer and lenticular sheet that you are going to use. The DPI is the printer DPI (dots per inch) that you will be printing the final image at.
LPI is the Lenses Per Inch of the lenticular sheet. Typical values are 30, 40, 60, and 75 and a bit.
The DPL is a number representing DPI/LPI. Don't worry about this.
The alignment borders is an option allowing you to put an alignment grid around the picture - dont worry about this as it's not yet implemented.
The Quit button simply closes the program.
Pressing the interleave button will take all the images that you have selected and will interleave them into an output image suitable for printing This image will be displayed in a preview window. You can scroll around the image using the scroll bars (if its big enough) and zoom in/out by right/left clicking with the mouse (be sure to hold it very still while doing so). If you are happy with the image press "Save" and enter your save name - the image is always saved in PNG format, you have to enter the file extension.